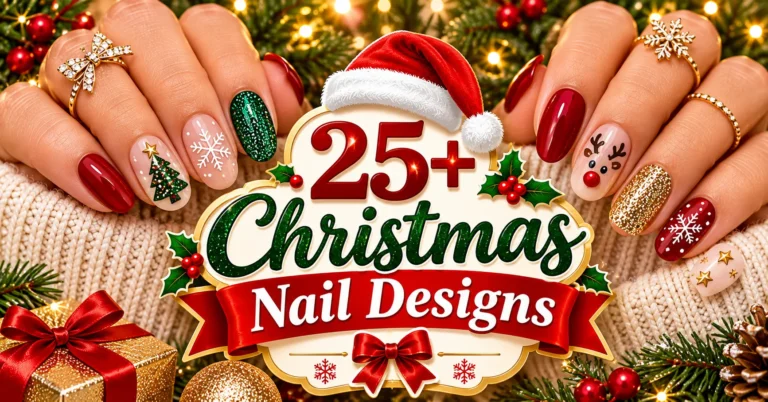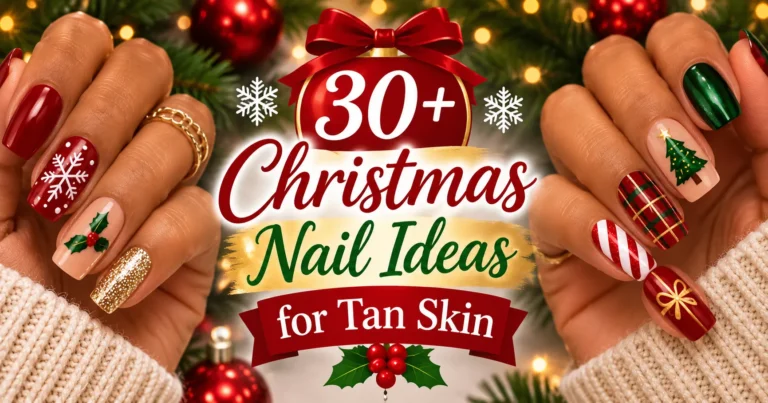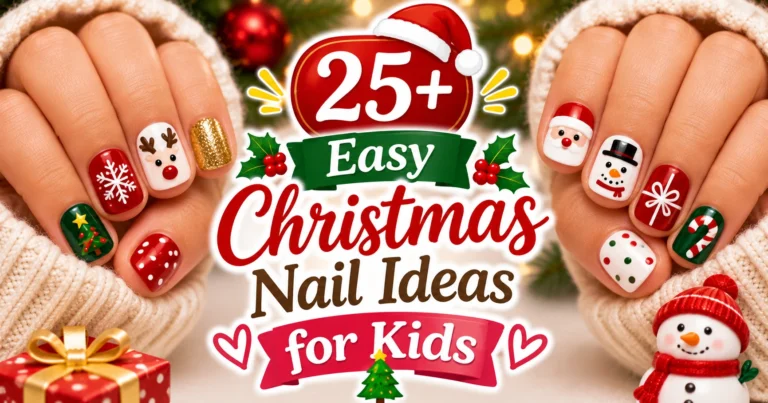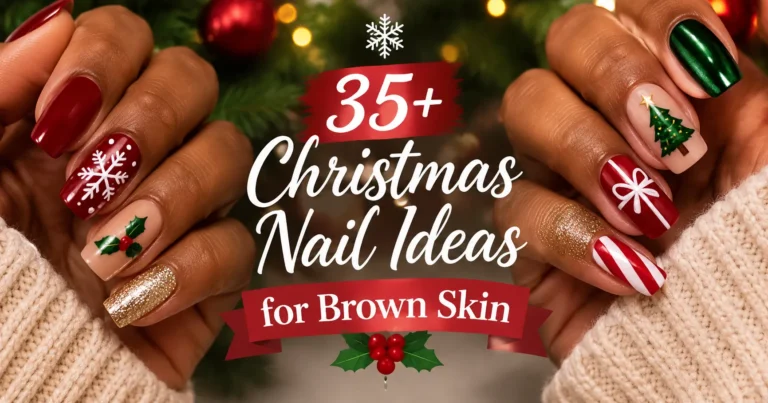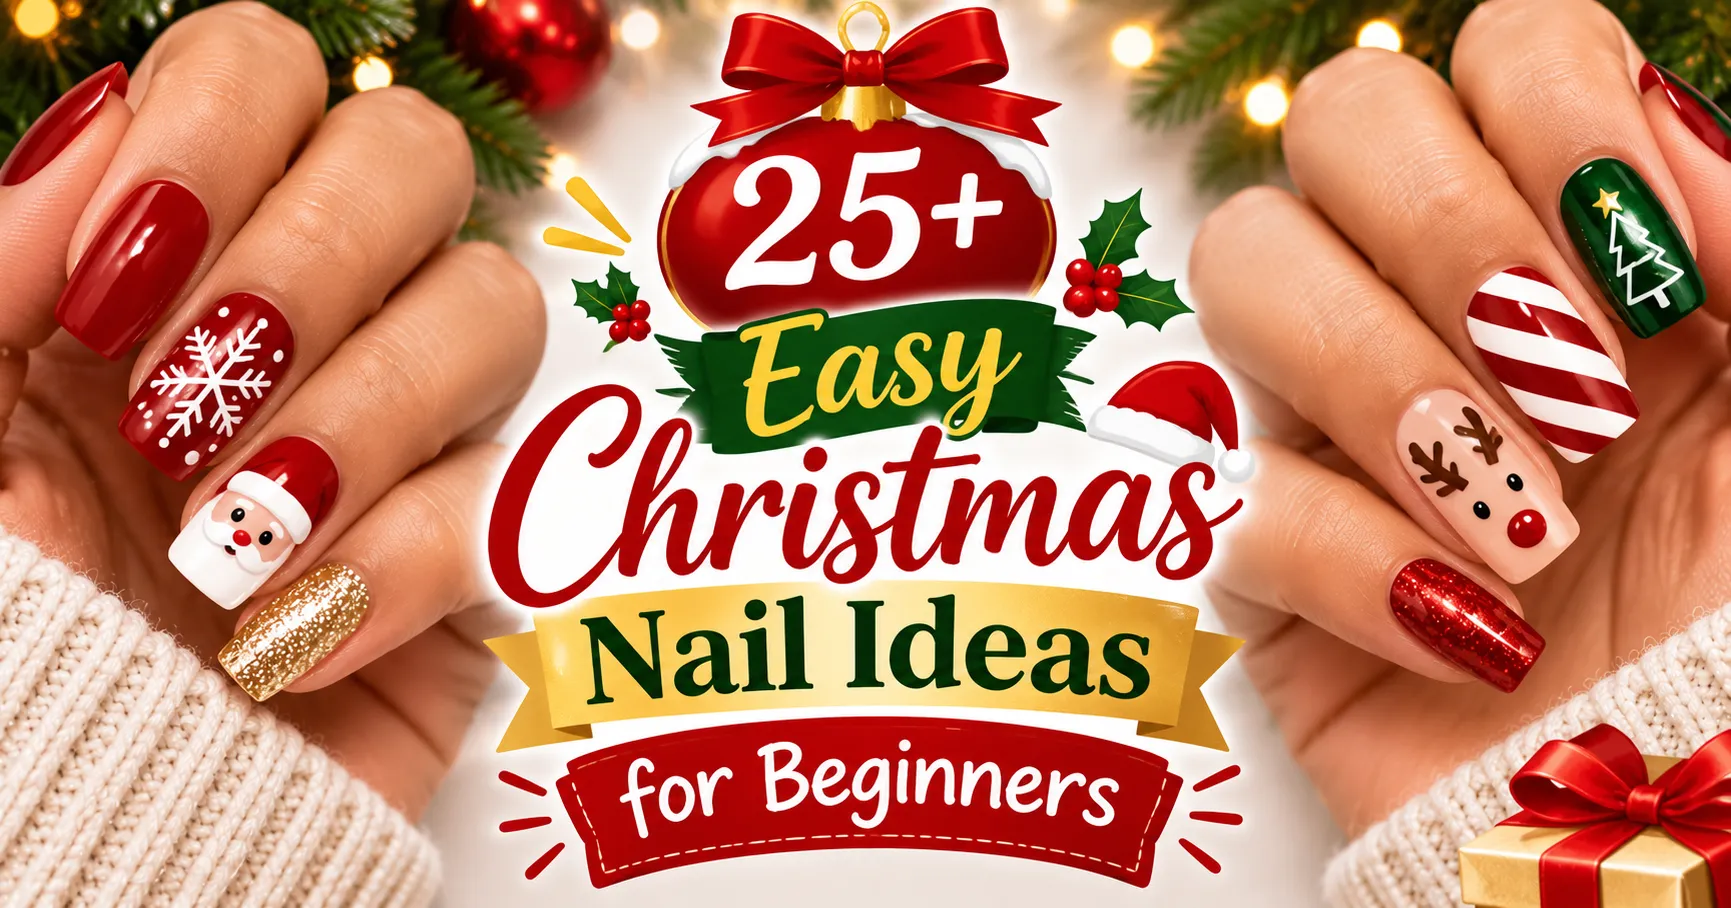
25+ Easy Christmas Nail Ideas for Beginners That Look Seriously Gorgeous
Christmas is the perfect time to experiment with cute, festive nail designs. From classic red and green shades to delicate snowflakes, glitter accents, and adorable little bows, there are so many ways to make your manicure feel special. The best part? You don’t need professional nail art skills to create a beautiful holiday look.
If you’re searching for Christmas Nail for Beginners, you’ve come to the right place. These easy Christmas nail designs are simple, affordable, and perfect for recreating at home. Whether you prefer short nails, neutral colors, or playful festive patterns, you’ll find plenty of inspiration here.
Most of these ideas require only basic nail polish, a thin brush, a dotting tool, or a few nail stickers. So grab your favorite Christmas colors and get ready to create a manicure that looks seriously gorgeous throughout the holiday season!
What You Need to Create Easy Christmas Nail Designs at Home
Before trying these designs, gather a few basic nail art supplies. You don’t need an expensive professional kit to get started.
Here are some useful essentials:
- Base coat: Helps create a smooth foundation for your manicure.
- Nail polish: Choose festive shades like red, green, white, nude, gold, and silver.
- Top coat: Adds shine and helps protect your nail art.
- Thin nail art brush: Useful for drawing lines, bows, and tiny Christmas trees.
- Dotting tool: Makes snowflakes, berries, ornaments, and festive dots easier.
- Nail stickers: A quick alternative when you’re not comfortable painting detailed designs.
- Nail file and buffer: Help shape and smooth your nails before applying polish.
Now, let’s explore some beautiful and beginner-friendly Christmas nail ideas you can try this year.
25+ Easy Christmas Nail Ideas for Beginners
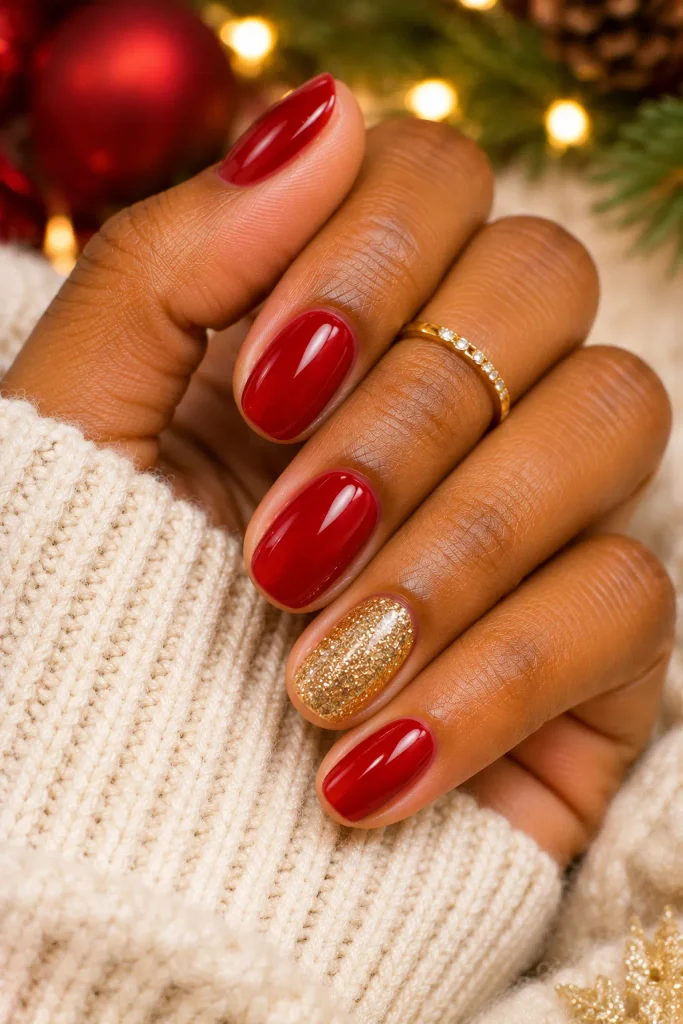
1. Classic Red Christmas Nails
You can never go wrong with classic red nails during Christmas. This timeless shade looks beautiful on both short and long nails and doesn’t require any complicated nail art.
Simply apply two coats of your favorite cherry-red polish and finish with a glossy top coat. If you want a little extra sparkle, add a small gold accent to your ring finger.
Why beginners love it: You only need one main polish color and a top coat.
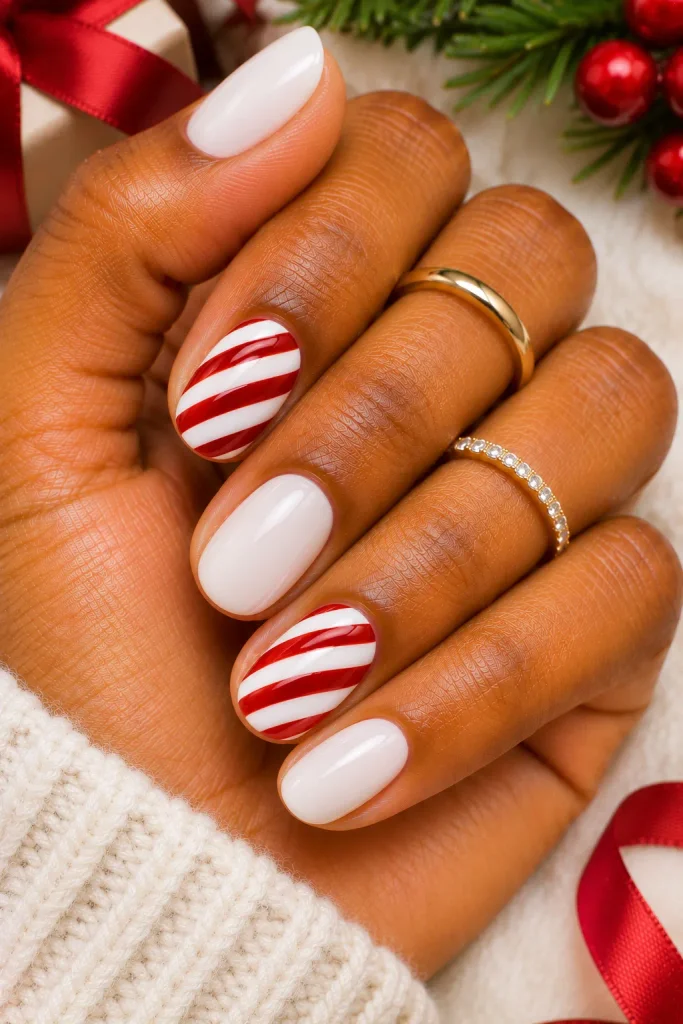
2. Simple Candy Cane Striped Nails
Candy cane nails are one of the cutest ways to bring Christmas spirit to your manicure. The combination of red and white stripes instantly creates a festive appearance.
Start with a white base coat and use a thin nail art brush to draw diagonal red lines. Don’t worry if the stripes aren’t perfectly straight because small imperfections can make the design look playful.
Beginner tip: Use red nail art tape or stickers if drawing stripes feels difficult.
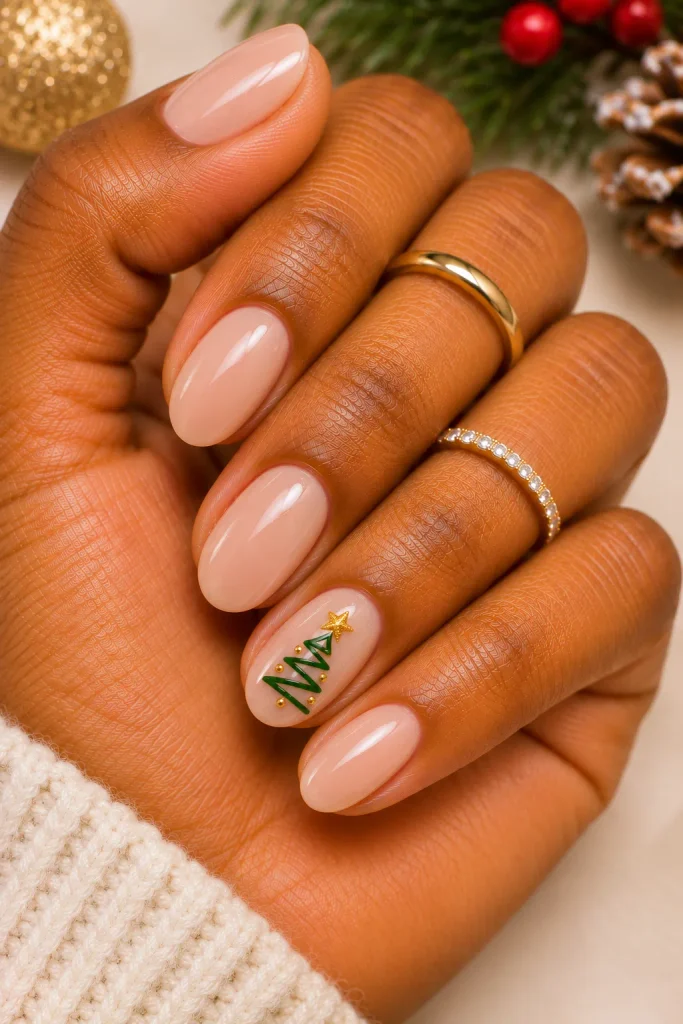
3. Minimal Christmas Tree Accent Nails
A tiny Christmas tree can turn a simple manicure into something festive without making it look too busy.
Choose a nude, milky white, or pale pink base. On one accent nail, use a thin green brush to create a small zigzag tree shape. Finish with a tiny gold dot at the top.
This design is perfect if you enjoy minimalist nail art but still want something seasonal.
Beginner tip: A toothpick can work as a simple alternative to a nail art brush.
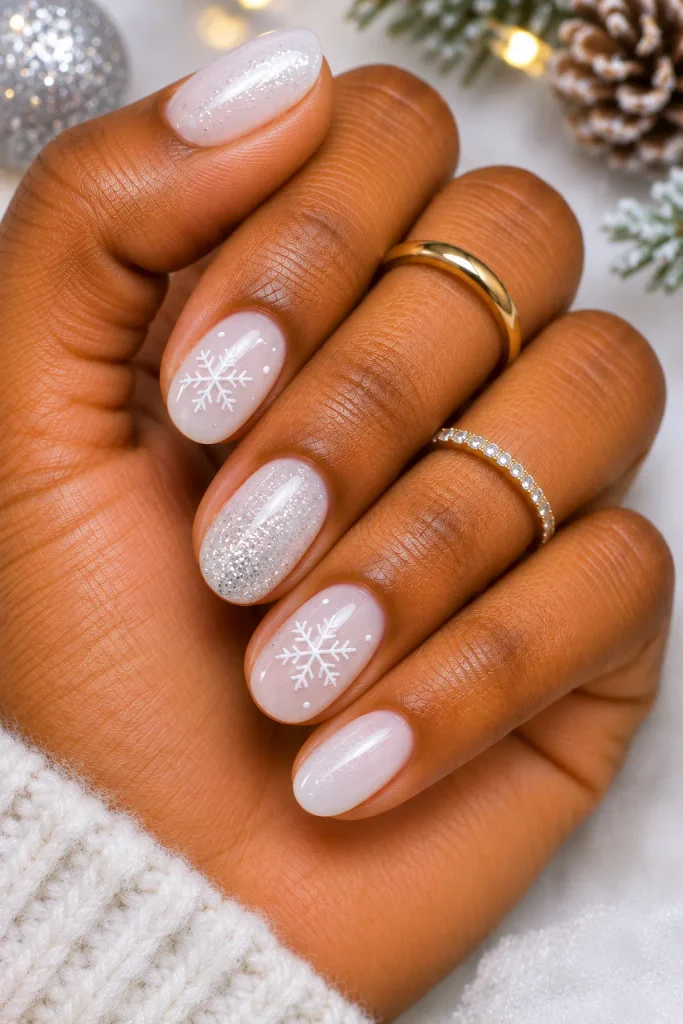
4. White Snowflake Christmas Nails
Snowflake nails are a beautiful option for anyone who loves a soft winter-inspired manicure.
Apply a sheer white or pale blue polish as your base. Then use a fine brush or white nail stickers to add delicate snowflakes to one or two nails. A little silver glitter can make the design look even more magical.
Beginner tip: Snowflake stickers are an easy way to achieve detailed nail art without freehand painting.
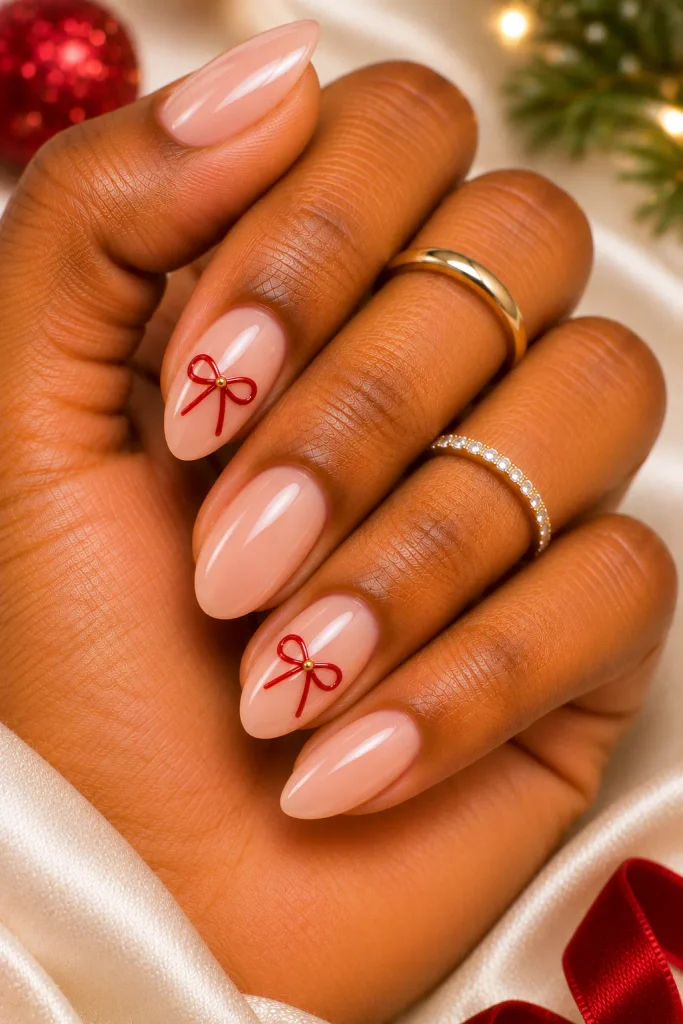
5. Nude Nails With Tiny Red Bows
If you prefer elegant and feminine manicures, nude nails with little red bows are a lovely choice.
Start with a sheer pink or nude base. Add a tiny red bow to your ring finger using a fine nail art brush. You can also use small bow-shaped nail stickers to make the process easier.
The neutral background keeps the design sophisticated while the red details provide a festive touch.
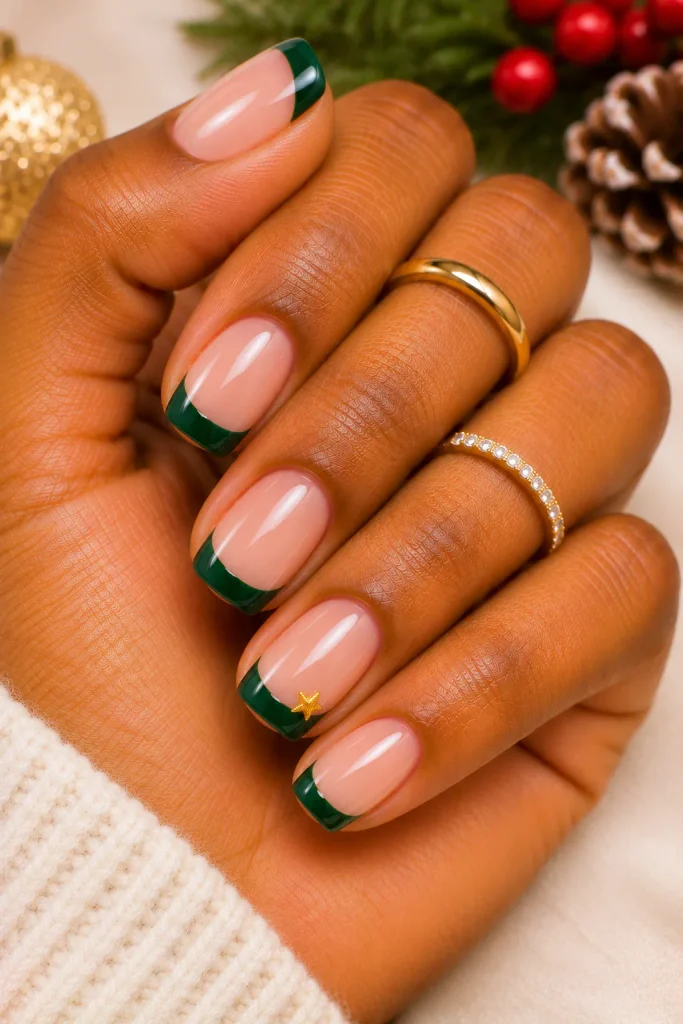
6. Green French Tip Christmas Nails
Give the traditional French manicure a festive update with beautiful green tips.
Apply a sheer nude or pink base and carefully paint the nail tips with deep emerald or forest-green polish. You can keep the design simple or add a tiny gold star to one nail.
This style looks particularly pretty on short square and almond-shaped nails.
Beginner tip: French tip guides can help you create neat and even edges.
7. Glittery Gold Christmas Nails
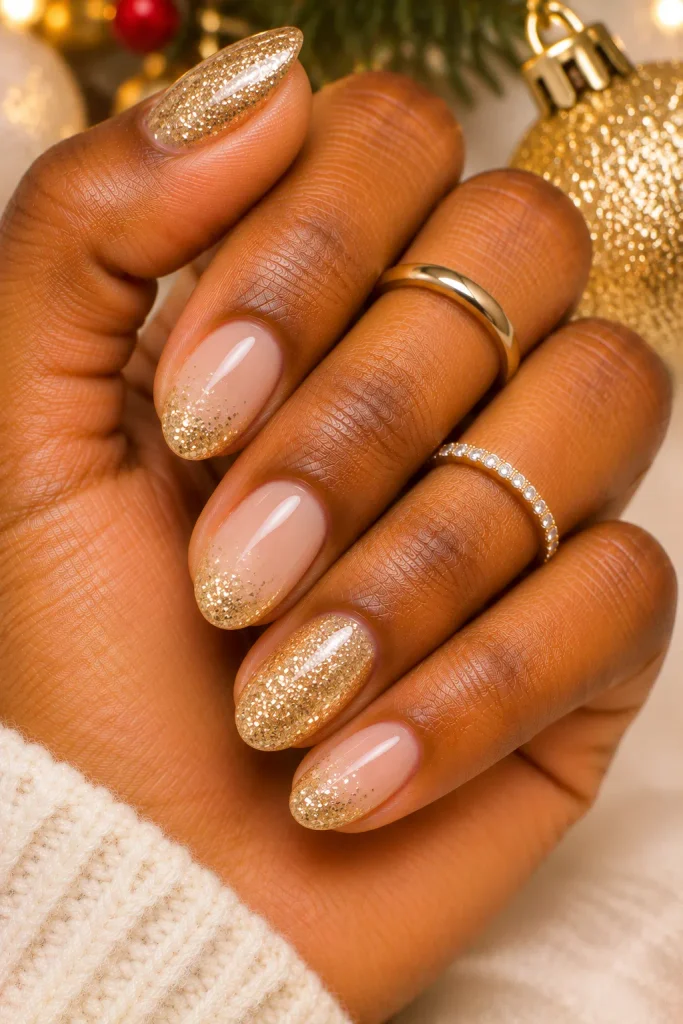
Want something festive without spending hours on nail art? Gold glitter nails are an excellent choice.
Apply a nude or champagne base and add a layer of fine gold glitter polish. You can cover every nail or keep the glitter on just two accent fingers.
The sparkling finish looks beautiful under Christmas lights and is perfect for holiday parties.
Beginner tip: Glitter polish is more forgiving than detailed hand-painted designs.
8. Cute Gingerbread Man Nails
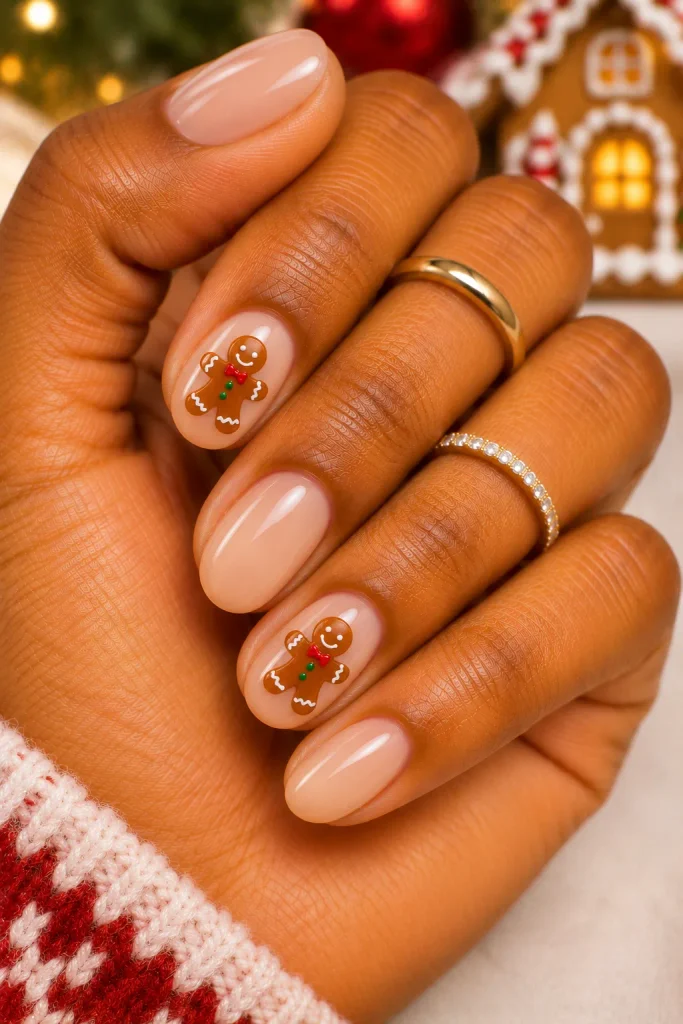
Gingerbread nails are adorable, playful, and perfect for a fun Christmas manicure.
Start with a creamy beige or nude base. Use brown polish to create a tiny gingerbread figure on one accent nail. Add white dots for the icing and two tiny red or green dots for festive details.
If drawing a gingerbread character feels challenging, simply use Christmas nail stickers.
Beginner tip: A dotting tool makes adding the eyes and buttons much easier.
9. Red Glitter French Tips
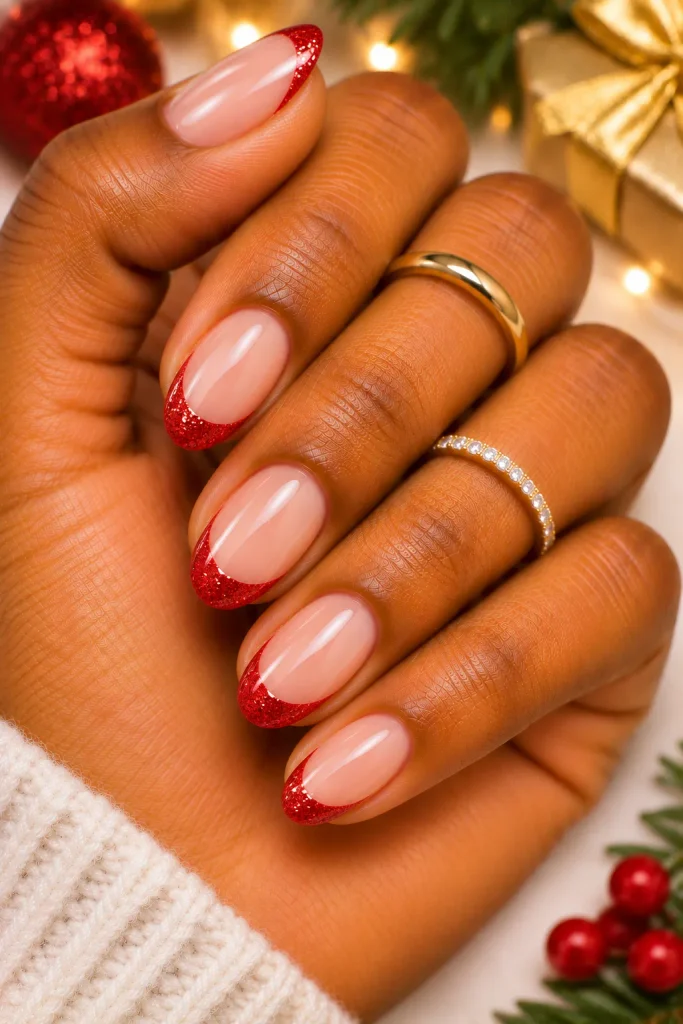
Red glitter French tips offer a glamorous alternative to traditional Christmas manicures.
Apply a soft pink or nude base, then paint the tips with sparkling red polish. Keep the glitter concentrated at the edges for a neat and elegant appearance.
This design is easy to recreate and works beautifully on both short and medium-length nails.
Beginner tip: Use French manicure guides to keep the glitter tips even.
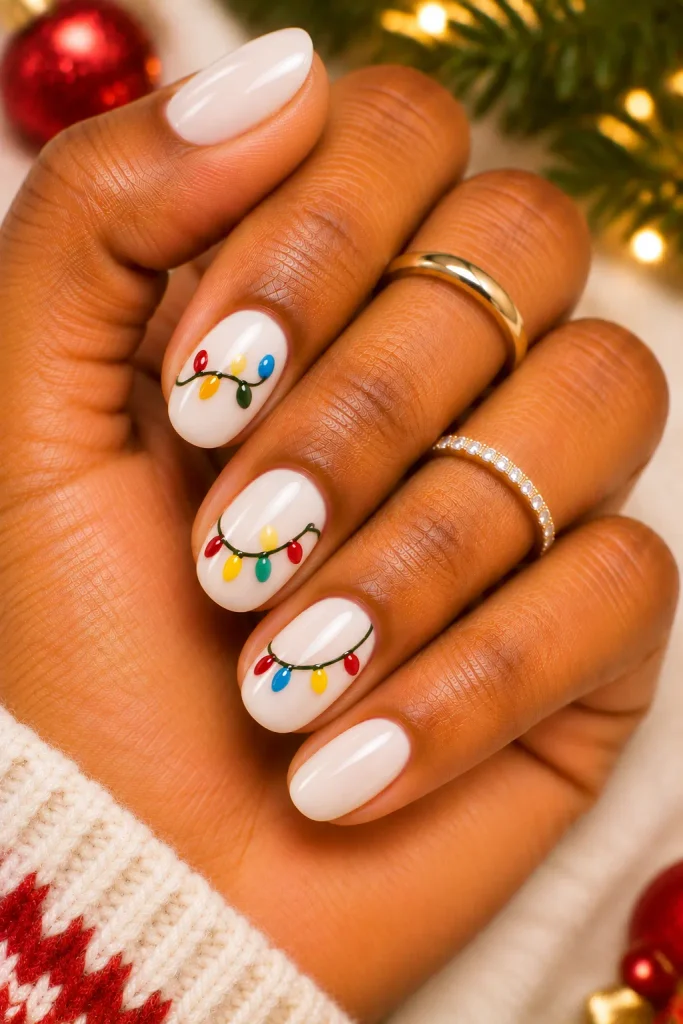
10. Simple Christmas Lights Nails
Colorful Christmas lights can make your manicure look cheerful and creative.
Apply a nude or milky white base. Draw a thin curved black or dark green line across one or two nails. Add tiny red, yellow, blue, and green dots along the line to represent Christmas lights.
It’s a simple design that looks impressive without requiring advanced nail art skills.
Beginner tip: Use a toothpick to create small, colorful light bulbs.
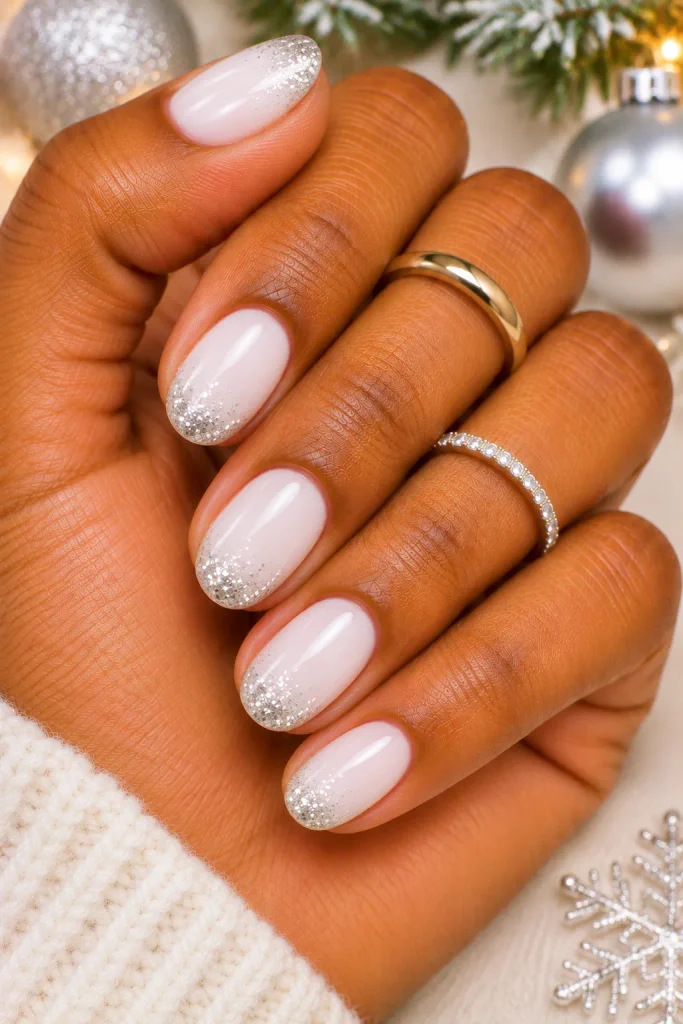
11. Milky White Nails With Silver Sparkle
For a clean and elegant holiday look, try milky white nails with a touch of silver glitter.
Apply two thin coats of milky white polish and add a small amount of silver shimmer near the tips. The result is soft, sophisticated, and perfect for anyone who doesn’t enjoy bold Christmas colors.
Beginner tip: Choose a sheer glitter polish for an effortless sparkling finish.
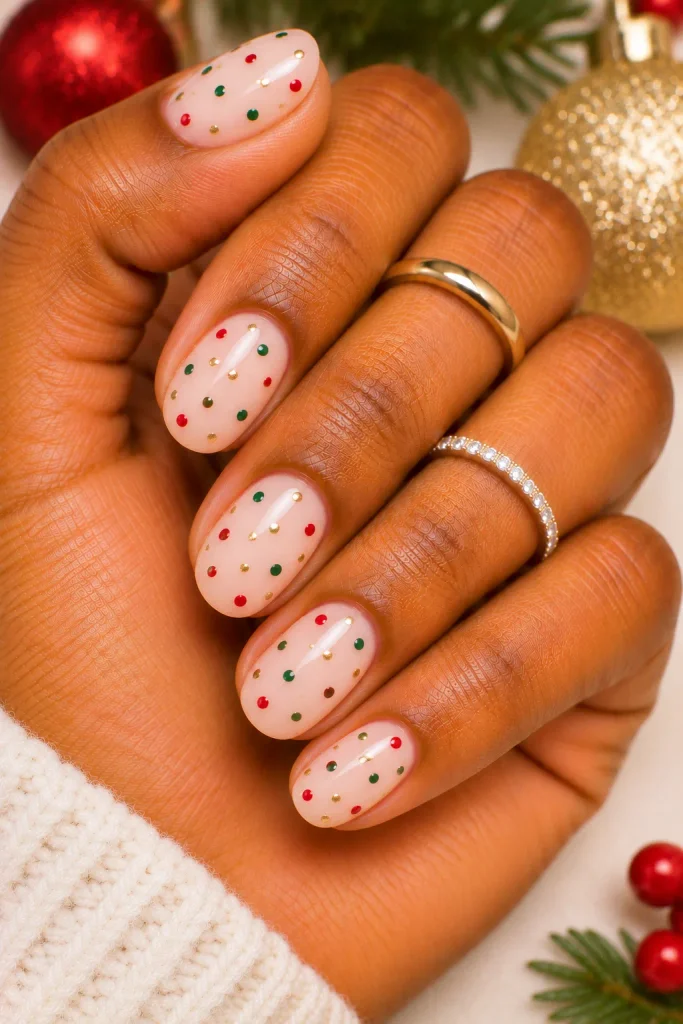
12. Festive Red and Green Dots
You don’t need complicated patterns to create adorable Christmas nail art. Tiny red and green dots are enough to make a manicure feel festive.
Start with a nude, white, or pale pink base. Use a dotting tool to add small red and green dots across each nail. Finish with a glossy top coat.
The design resembles miniature Christmas confetti and is especially pretty on short nails.
Beginner tip: Space your dots evenly and use different sizes to create a playful look.
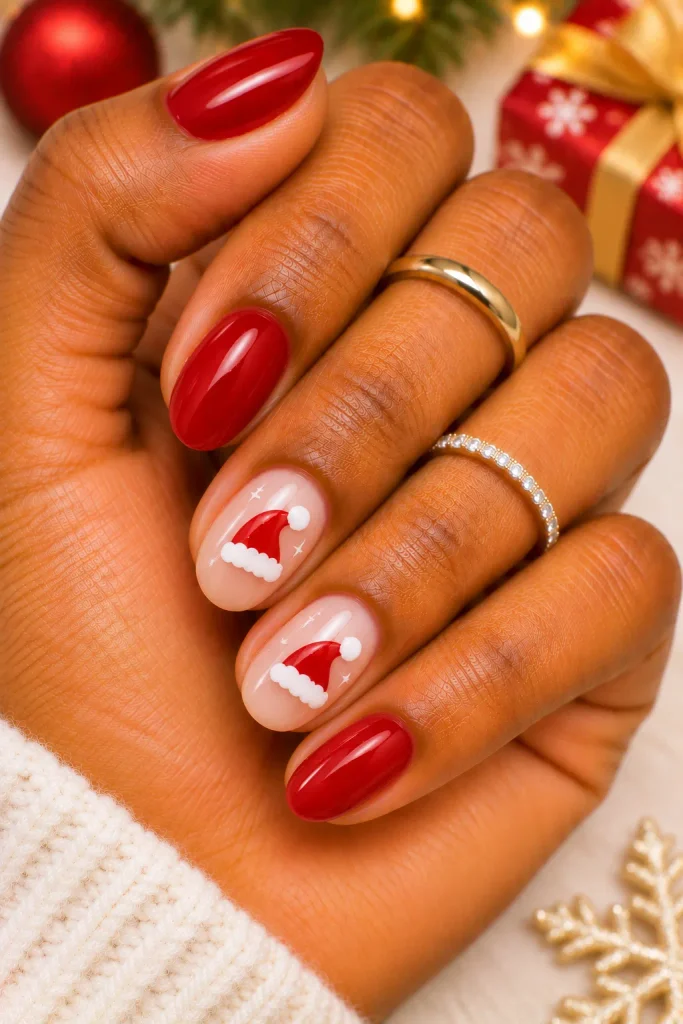
13. Cute Santa Hat Nails
Santa hat nails are a fun way to add a little Christmas character to your manicure.
Apply a sheer nude or pale pink base. Paint a small red triangle near the tip of one accent nail, then add a white line and a tiny white dot to complete the Santa hat.
You can keep the remaining nails solid red or white for a coordinated look.
Beginner tip: Use a small nail art sticker if painting the triangle is difficult.
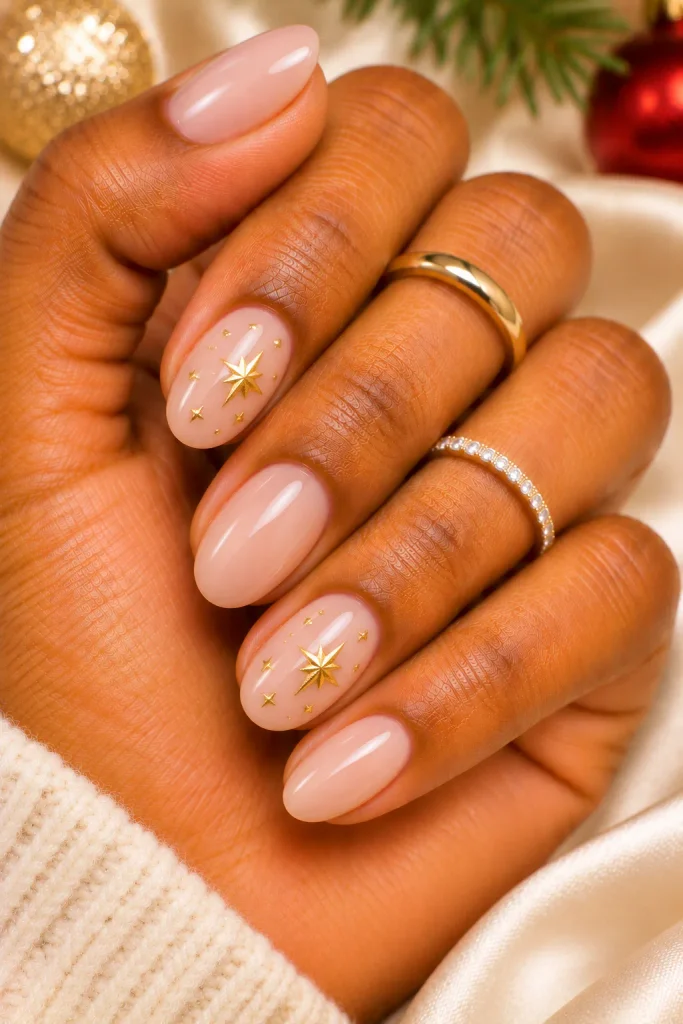
14. Neutral Christmas Nails With Gold Stars
Neutral Christmas nails are perfect for people who prefer understated beauty.
Choose a beige, nude, or creamy pink base and decorate two accent nails with tiny gold stars. You can paint the stars using a fine brush or apply metallic star stickers.
The result is subtle enough for everyday wear but still has a beautiful holiday feel.
Beginner tip: Metallic nail stickers make this design incredibly easy.
15. Pink Christmas Nails With Glitter
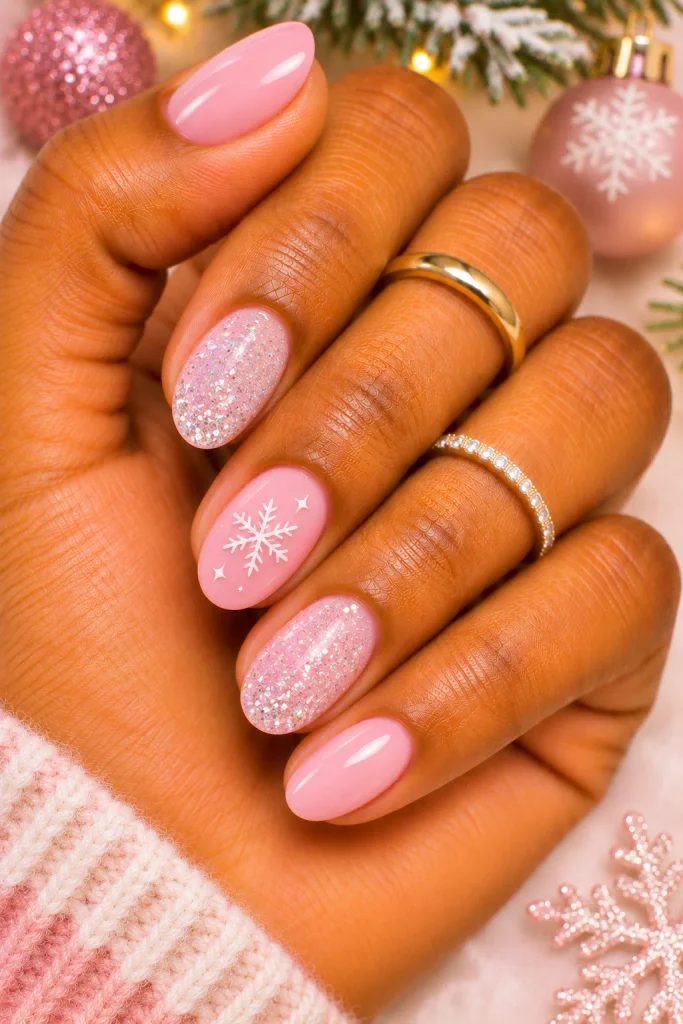
Pink Christmas nails are a lovely alternative to traditional red and green designs.
Choose a soft baby pink or blush polish and add fine silver or iridescent glitter to one or two nails. For an extra festive touch, include a tiny white snowflake or star.
This combination looks especially beautiful on short almond nails.
Beginner tip: Use a glitter top coat instead of applying loose glitter.
16. Easy Christmas Ornament Nails
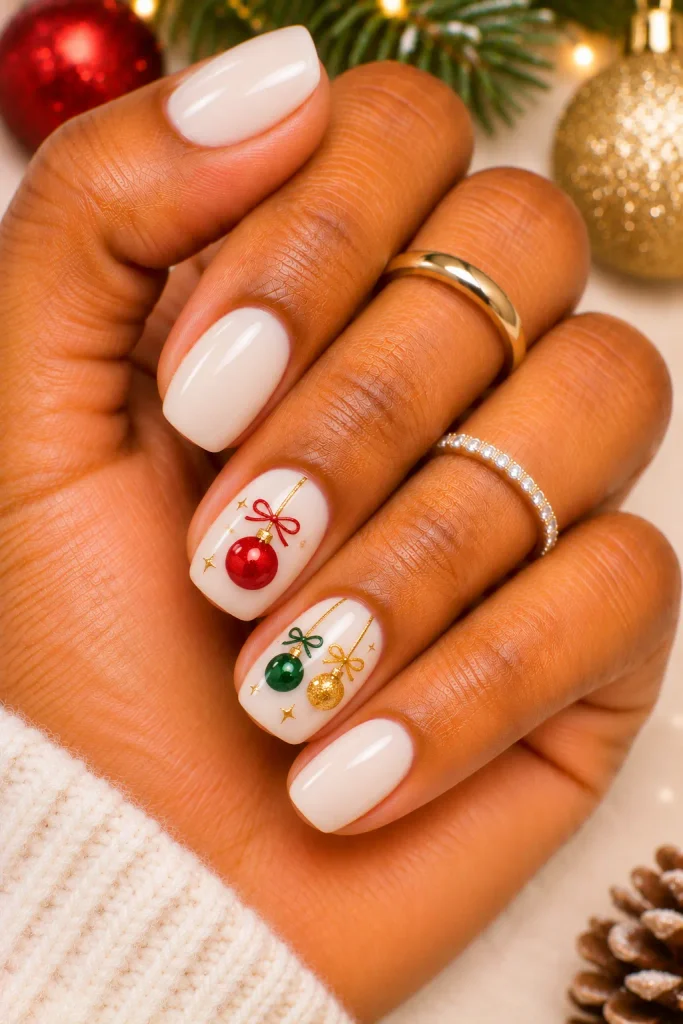
Christmas ornament nails are a beautiful way to add a decorative holiday detail.
Start with a milky white or nude base. On one accent nail, paint a small round ornament using red, green, or gold polish. Add a tiny line and bow above it to complete the look.
You can create several ornaments in different colors if you prefer a more playful manicure.
Beginner tip: Use a dotting tool to make perfectly rounded ornament shapes.
17. Emerald Green Glitter Nails
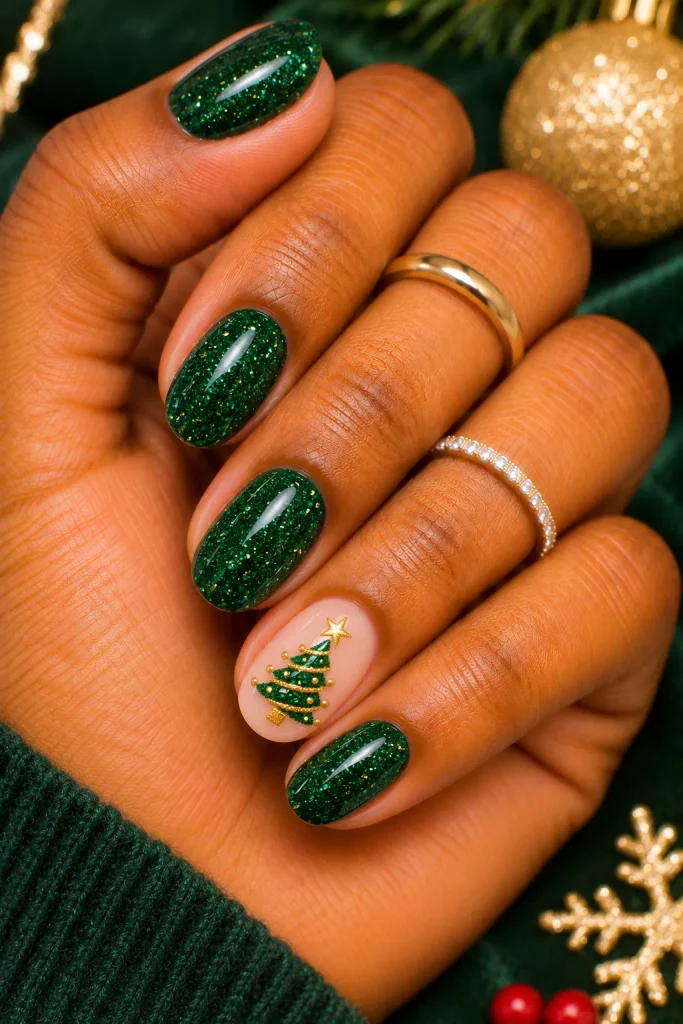
Emerald green is one of the most beautiful colors for a winter manicure.
Apply two coats of deep green polish and add fine green or gold glitter to create a sparkling finish. You can also leave one nail nude and decorate it with a tiny green Christmas tree.
This look is perfect if you want something bold but easy to create.
Beginner tip: A ready-made emerald glitter polish saves time and effort.
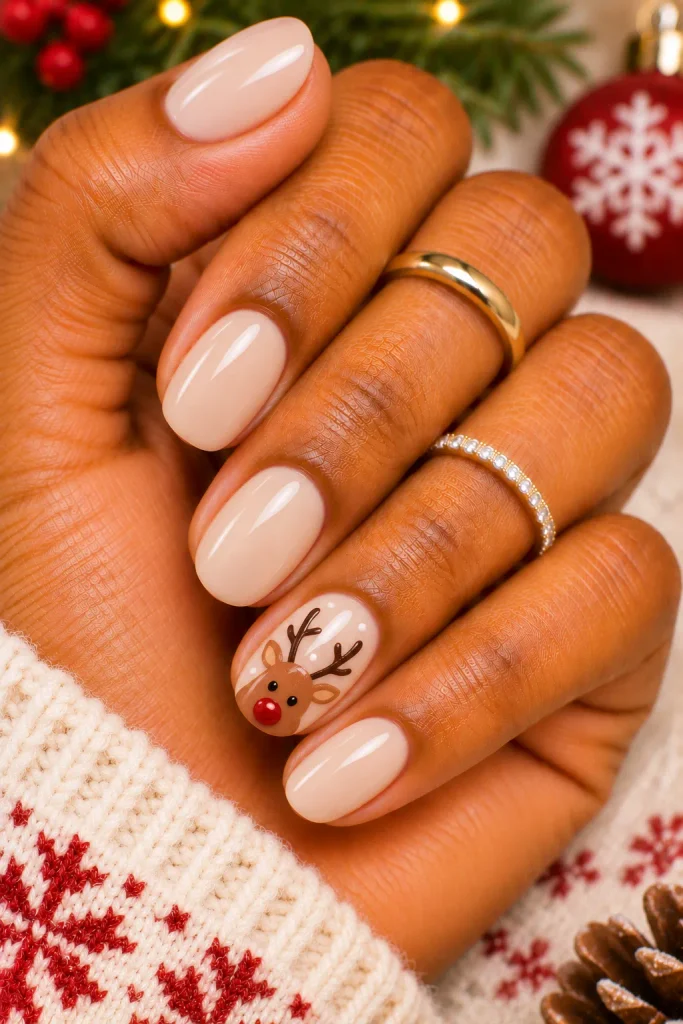
18. Simple Reindeer Accent Nails
Reindeer nail art adds a cute and playful touch to a Christmas manicure.
Use a nude or creamy white base and paint a small brown reindeer face on one accent nail. Add tiny black eyes, a brown nose, and small antlers using a thin brush.
For an easier version, use a reindeer sticker.
Beginner tip: Focus on one accent nail instead of painting every finger.
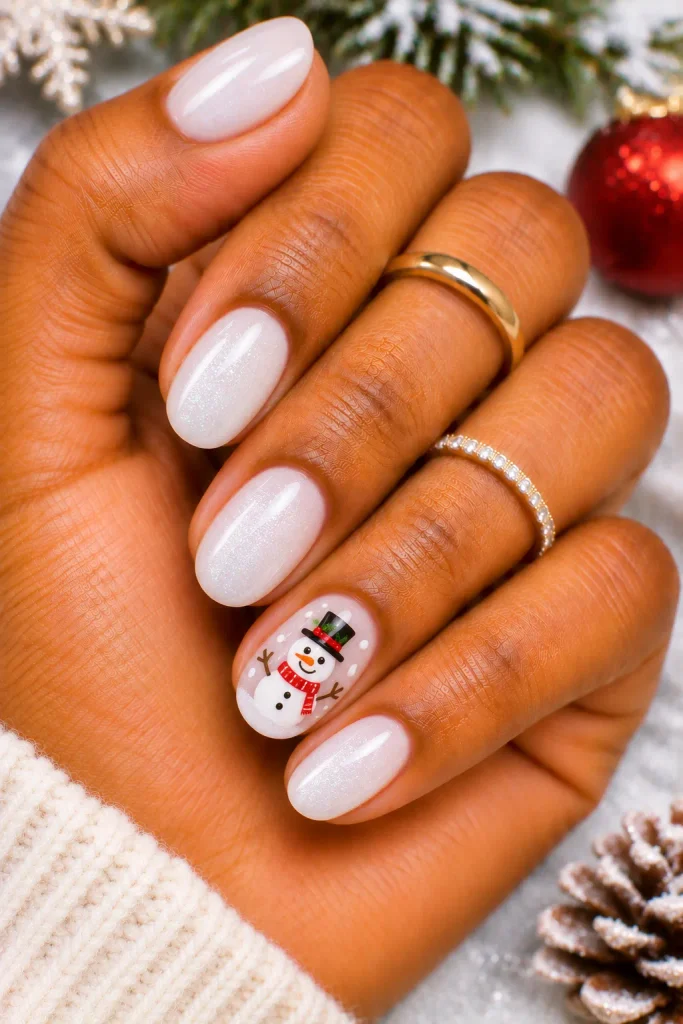
19. Simple Snowman Accent Nails
Snowman nails are another adorable design that beginners can easily recreate.
Apply a pale blue or white base. Use a dotting tool to create two white circles on an accent nail. Add tiny black eyes, a small orange nose, and a little scarf for a complete snowman look.
Keep the remaining nails simple to let your accent design stand out.
Beginner tip: Make the larger circle first and add a smaller one above it.
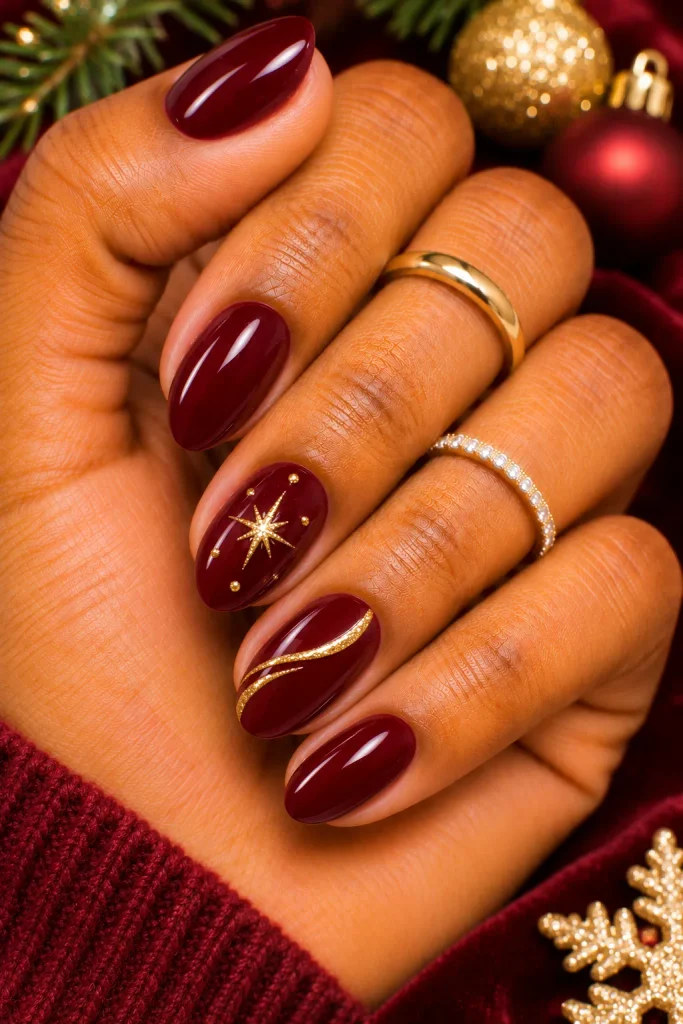
20. Burgundy Christmas Nails With Gold Accents
If you want a richer and more sophisticated holiday manicure, burgundy is a beautiful choice.
Apply deep burgundy polish to most nails and add a thin gold line or tiny gold star to one accent nail. The combination creates an elegant look that works for Christmas dinners and evening celebrations.
Beginner tip: Gold nail stickers are an easy way to add metallic details.
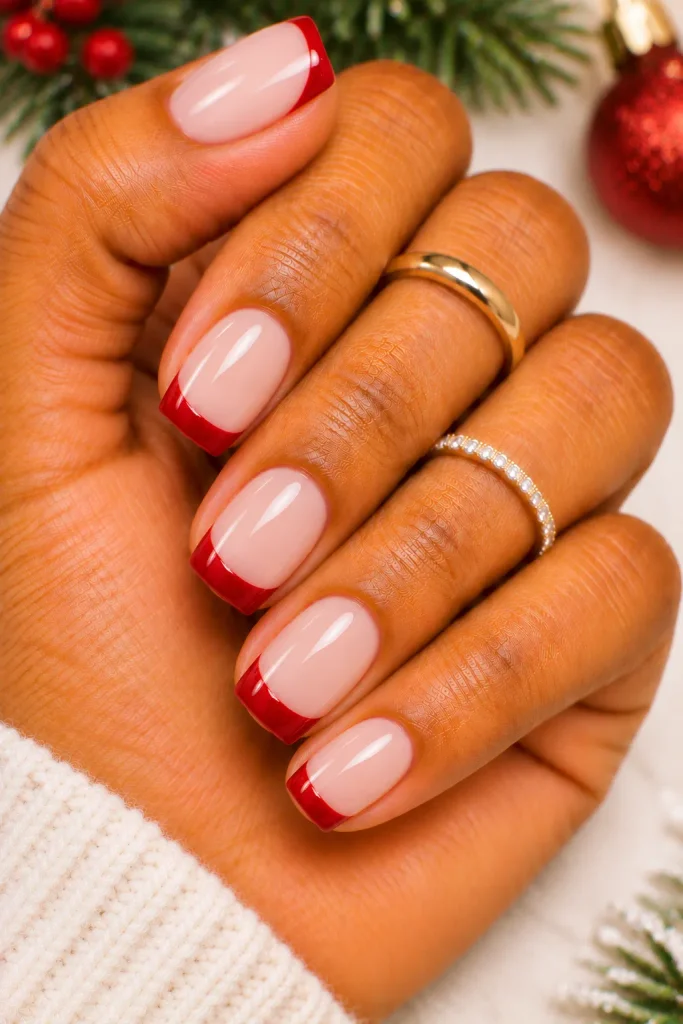
21. White French Nails With Red Tips
White French manicures are timeless, but replacing traditional white tips with red creates a lovely Christmas-inspired look.
Start with a sheer pink base and carefully paint thin red tips. Add a small silver or gold accent if you want something extra.
This design is particularly suitable for beginners who are already comfortable with basic French manicures.
Beginner tip: Use French tip stickers to achieve a clean smile line.
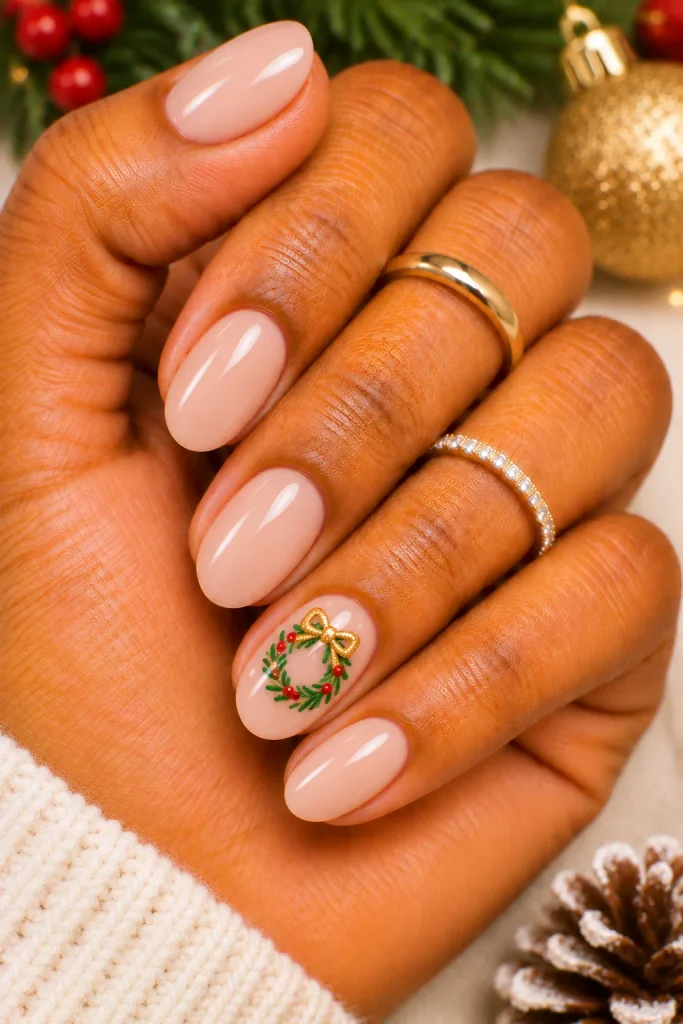
22. Christmas Wreath Accent Nails
A miniature Christmas wreath can make your manicure look delicate and creative.
Choose a pale nude or white base. Use a thin green brush to draw a small circular wreath on one accent nail. Add a few tiny red dots to represent berries and finish with a little gold bow.
The design looks complicated but can be created with just a few simple strokes.
Beginner tip: Draw small green dots in a circle if you’re not confident painting leaves.
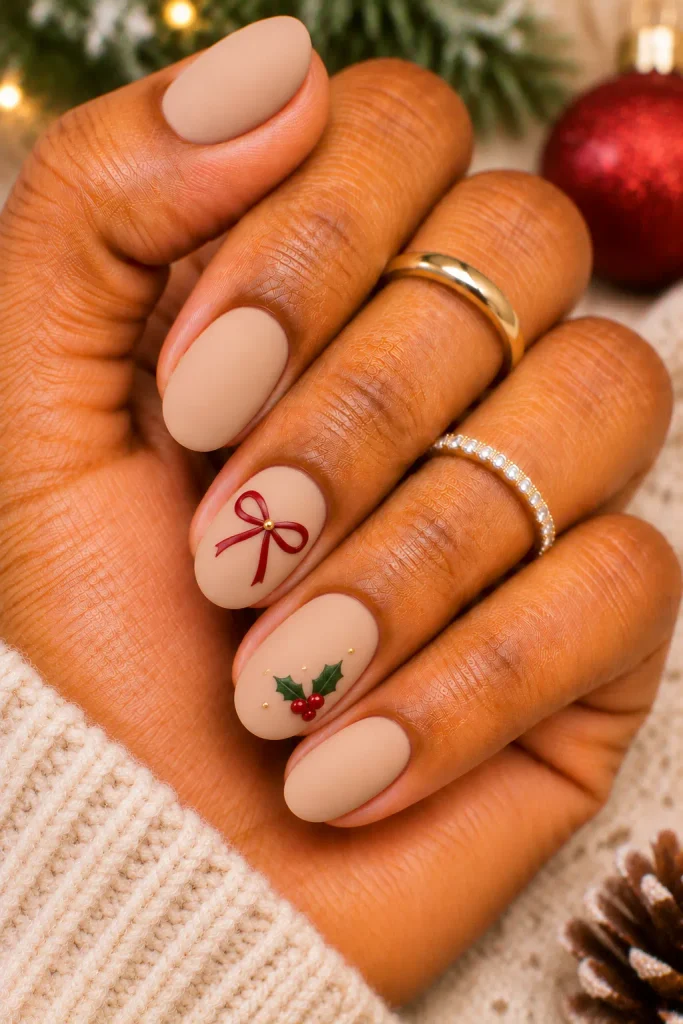
23. Matte Nude Christmas Nails
Matte nude nails are perfect for anyone who prefers a soft, modern manicure.
Apply a beige or warm nude polish and seal it with a matte top coat. For a festive touch, add tiny red stars, green leaves, or a delicate gold bow to one or two nails.
The matte finish gives the manicure a sophisticated appearance without requiring complicated artwork.
Beginner tip: A matte top coat can transform almost any regular nail polish.
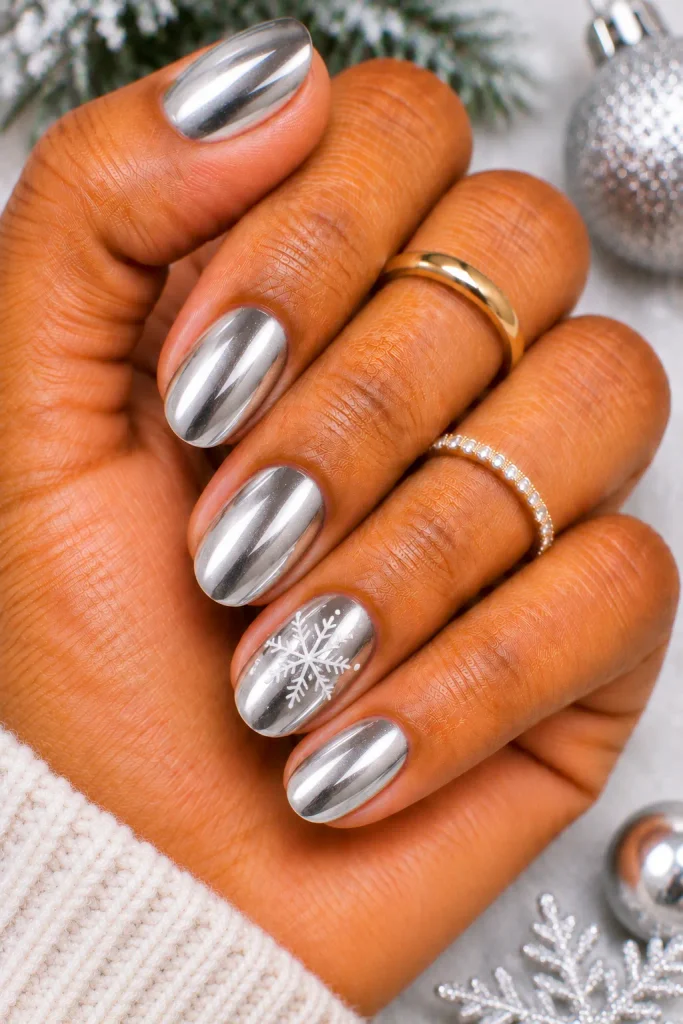
24. Simple Silver Chrome Christmas Nails
Silver chrome nails create a beautiful icy finish that feels perfect for the winter season.
Apply a silver chrome polish or use a chrome powder over a suitable gel base. Keep the design simple by adding a small snowflake or leaving the metallic finish on its own.
This is a great choice for anyone who loves shiny and modern manicures.
Beginner tip: Silver metallic nail polish is an easier alternative to professional chrome powder.
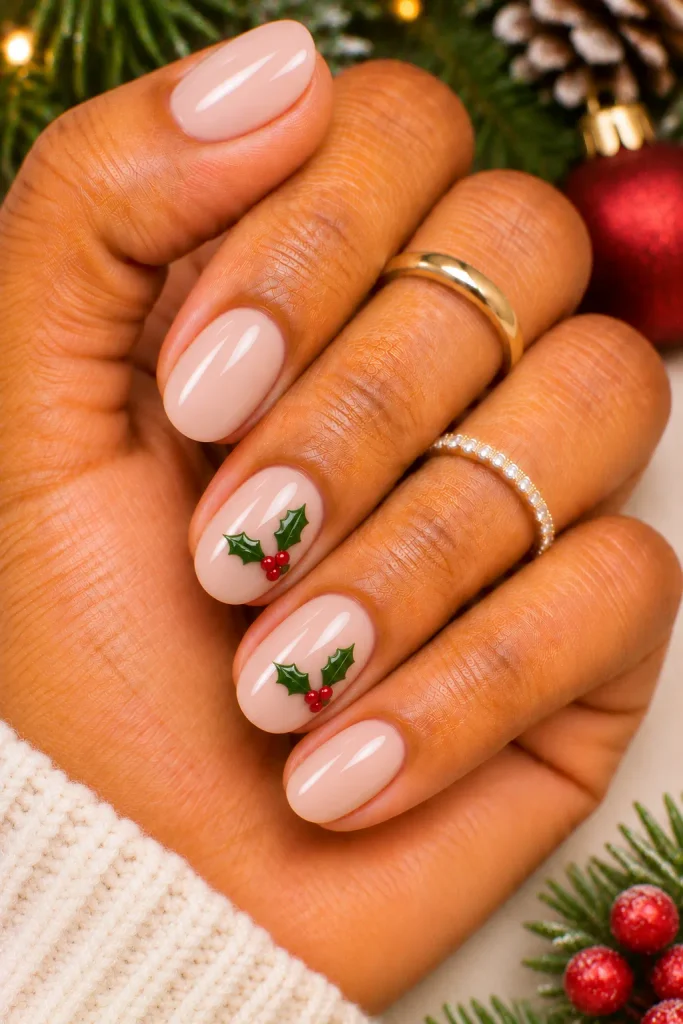
25. Christmas Holly Berry Nails
Holly berry nails are a classic holiday design that looks beautiful on a neutral base.
Apply a sheer pink or milky white polish. Use a thin green brush to create two or three tiny holly leaves on one accent nail. Add three small red dots in the center to complete the design.
You can repeat the pattern on two fingers or keep it minimal with a single accent.
Beginner tip: A toothpick works well for creating the tiny red berries.
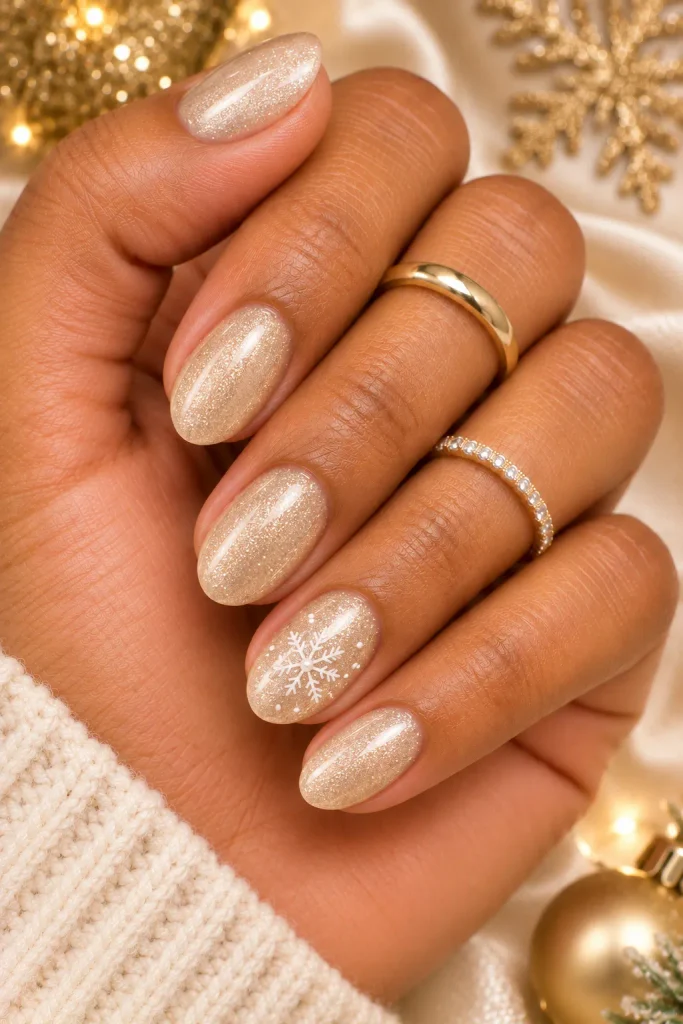
26. Champagne Shimmer Christmas Nails
Champagne shimmer nails are a beautiful option if you want something festive without using traditional Christmas colors.
Choose a soft champagne or pale gold polish and apply two thin coats. Add a delicate white snowflake or tiny gold star to one accent nail for a little extra detail.
This manicure looks elegant with both casual winter outfits and party dresses.
Beginner tip: Choose a polish that already contains fine shimmer to avoid working with loose glitter.
Easy Tips for Creating Christmas Nail Art at Home
Creating a beautiful holiday manicure doesn’t have to be difficult. A few simple techniques can help your designs look cleaner and last longer.
1. Prepare Your Nails First
Remove old polish, gently shape your nails, and clean the nail surface before applying a base coat. Good preparation creates a smoother foundation.
2. Apply Thin Layers
Avoid applying thick coats of polish. Two or three thin layers usually provide a neater finish and help prevent smudging.
3. Start With Simple Designs
If you’re new to nail art, begin with dots, stripes, glitter, and simple French tips. Once you’re comfortable, try tiny Christmas trees, bows, and snowflakes.
4. Use Nail Stickers
Stickers are a great shortcut for detailed Christmas designs. They allow you to create festive patterns without needing advanced painting skills.
5. Always Finish With a Top Coat
A glossy top coat helps seal your design and gives your manicure a polished appearance. Follow the product’s instructions, especially when using gel polish.
6. Don’t Rush Between Coats
Allow regular nail polish to dry between layers. Rushing can create smudges and ruin small details.
Final Thoughts
Creating a festive manicure doesn’t require expensive products or professional nail art skills. With a few basic supplies, your favorite Christmas colors, and a little creativity, you can achieve beautiful results right at home.
These Christmas Nail for Beginners ideas offer something for everyone, whether you love classic red polish, sparkling gold accents, cute gingerbread designs, or elegant nude manicures.
Start with a design that feels comfortable, experiment with different festive combinations, and don’t be afraid to add your own creative touch.
Save your favorite ideas, grab your nail polish, and get ready to make your nails part of the Christmas celebration!
Frequently Asked Questions About Christmas Nail for Beginners
1. What Are the Easiest Christmas Nail Designs for Beginners?
Some of the easiest designs include classic red nails, glitter accents, candy cane stripes, Christmas dots, and simple French tips. These styles require only a few basic colors and simple tools.
2. What Colors Are Best for Beginner Christmas Nails?
Red, green, white, gold, silver, nude, and pink are popular choices. These colors can be combined to create both traditional and modern festive manicures.
3. Can I Create Christmas Nail Art at Home Without Professional Tools?
Absolutely! You can use everyday items such as toothpicks, cotton swabs, and small brushes for simple nail art. Nail stickers are another easy option for detailed designs.
4. What Are the Best Christmas Nail Designs for Short Nails?
Short nails look beautiful with red French tips, tiny Christmas trees, snowflakes, glitter accents, festive dots, and minimalist bows. Simple patterns usually work especially well on shorter nail lengths.
5. How Can I Make My Christmas Nail Polish Last Longer?
Start with clean nails, apply a suitable base coat, use thin polish layers, and finish with a top coat. Avoid picking at your polish and follow the manufacturer’s instructions for drying or curing.
6. How Can Beginners Make Their Christmas Nails Look Professional?
Keep your cuticles neat, use thin coats, clean up excess polish around the edges, and avoid overcrowding your designs. A simple manicure with carefully placed details often looks more polished than an overly complicated one.